Hugo Cactus Theme Tweaks and Deploying Using Neocities CLI
I decided to use Hugo to generate my blog, since it builds quickly and comes bundled with all the necessary dependencies. I chose the Cactus theme for its aesthetics and readability, but I made some tweaks to it before publishing. Here’s what I did:
Automatic Dark Mode
The Cactus theme came bundled with four themes: Dark, White, Light, and Classic. I could manually set any of these, but I wanted my blog to switch colour schemes between Dark and Light automatically depending on the user’s operating system theme settings. The CSS prefers-color-scheme feature looked like exactly what I needed to implement this.
I ran into a challenge when I figured out that the Cactus theme’s colours are set using SCSS variables. As explained here, SCSS code needs to be converted (i.e. compiled) into CSS code before the browser can use it. After this conversion happens, the SCSS variables no longer exist, so they can’t be changed at runtime using queries like prefers-color-scheme. CSS custom properties, on the other hand, can be changed at runtime, so they respond to prefers-color-scheme just fine. I just had to turn all of my SCSS colour variables into CSS custom properties, and I would achieve the automatic dark mode I wanted.
I started by making a new css folder in the Cactus theme’s static folder. In this folder, I made a file called colors.css, which contained the following code:
@media (prefers-color-scheme: light) {
    :root {
        /* based on colours from assets/scss/colors/white.scss */
        --color-background: #FFFFFF;
        --color-footer-mobile-1:  color-mix(in srgb, var(--color-background), #000 2%);
        --color-footer-mobile-2: color-mix(in srgb, var(--color-background), #000 10%);
        --color-background-code: color-mix(in srgb, var(--color-background), #000 2%);
        --color-border: #666;
        --color-meta: #666;
        --color-meta-code: color-mix(in srgb, var(--color-meta), #fff 10%);
        --color-link: rgba(212, 128, 170, 1);
        --color-text: #383838;
        --color-accent-3: #8c8c8c;
        --color-accent-2: #383838;
        --color-accent-1: #2bbc8a;
        --color-quote: #2bbc8a;
    }
}
@media (prefers-color-scheme: dark) {
    :root {
        /* based on colours from assets/scss/colors/dark.scss */
        --color-background: #1d1f21;
        --color-footer-mobile-1: color-mix(in srgb, var(--color-background), #fff 2%);
        --color-footer-mobile-2: color-mix(in srgb, var(--color-background), #fff 10%);
        --color-background-code: color-mix(in srgb, var(--color-background), #fff 2%);
        --color-border: #666;
        --color-meta: #666;
        --color-meta-code: #666;
        --color-link: rgba(212, 128, 170, 1);
        --color-text: #c9cacc;
        --color-accent-3: #cccccc;
        --color-accent-2: #eeeeee;
        --color-accent-1: #2bbc8a;
        --color-quote: #ccffb6;
    }
}
CSS doesn’t have darken or lighten functions like SCSS does, so I replaced them all with color-mix function calls and it produced the same effect. To replace darken I mixed with black, and to replace lighten I mixed with white.
I then removed all the SCSS files in the Cactus theme’s assets/colors folder, and used the following regular expressions to replace all of the SCSS variable calls in the Cactus theme folder with CSS custom property calls:
- Search:
\$color-([-\w+]+) - Replace:
var(--color-$1)
As an example, this would replace all instances of $color-accent-3 with var(--color-accent-3).
Dark Mode-Compliant Syntax Highlighting
I’ll be posting a lot of code on this blog, so I wanted to give my syntax highlighting an automatic dark or light theme as well. I started by putting the following small block of code in my hugo.toml file:
[markup]
    [markup.highlight]
        noClasses = false
This would allow me to use custom syntax highlighting classes. Hugo uses Chroma for syntax highlighting, and the Chroma Playground gave me a good idea of what colour schemes were available. I chose Monokai Light for light mode, and Monokai for dark mode. I generated the classes in one file using commands adapted from here:
cd themes/cactus/static/css
echo "@media (prefers-color-scheme: light) {" >> syntax.css
hugo gen chromastyles --style="monokailight" >> syntax.css
echo "}" >> syntax.css
echo "@media (prefers-color-scheme: dark) {" >> syntax.css
hugo gen chromastyles --style="monokai" >> syntax.css
echo "}" >> syntax.css
And that was it! My automatic dark mode with automatic syntax highlighting was successfully implemented.
Removing Unnecessary Space
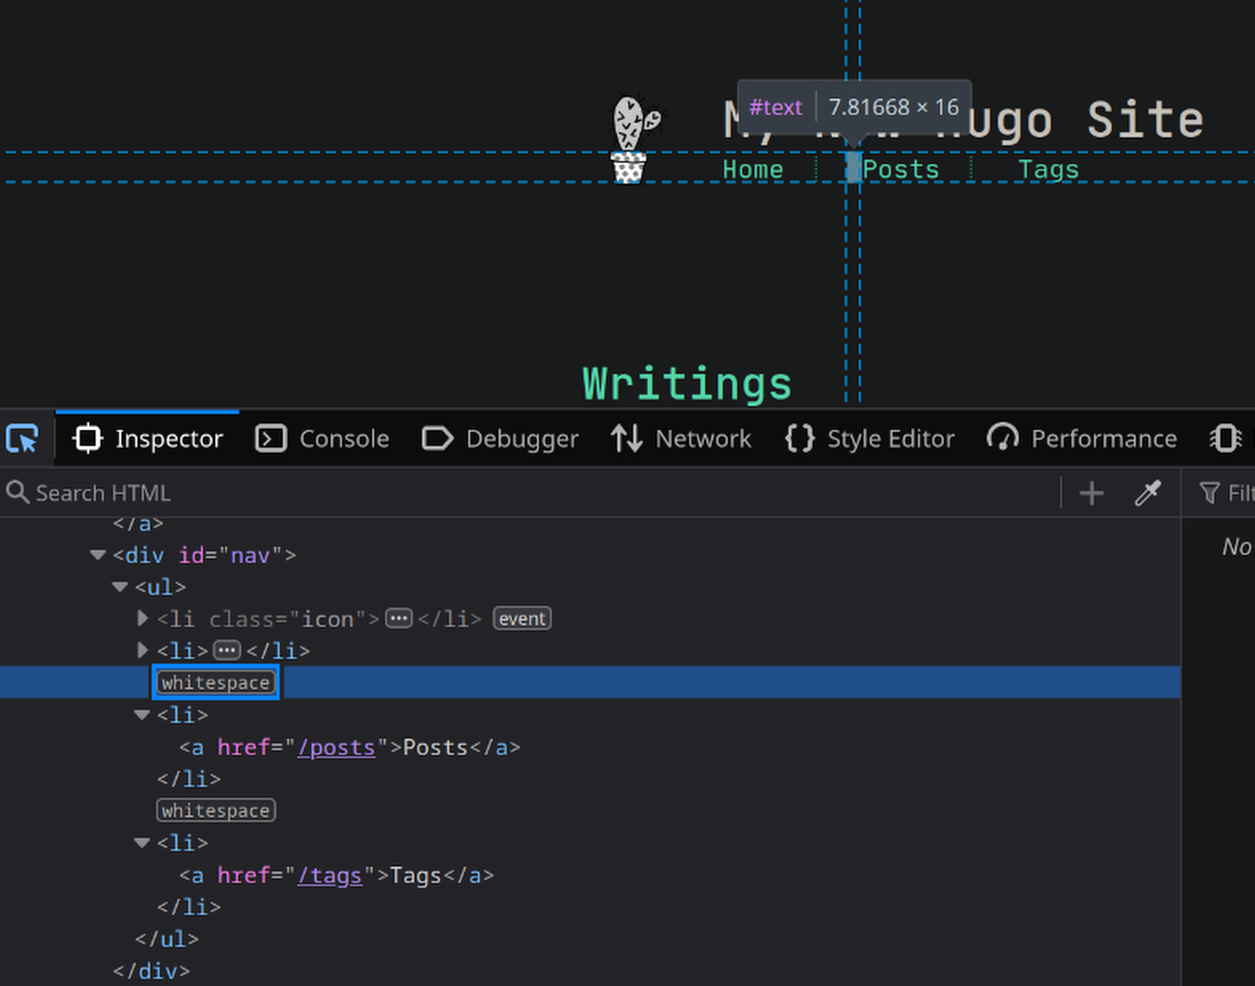
I discovered there was extra whitespace in between the list elements almost everywhere my blog’s navigation appeared. According to this StackOverflow question I found, this is a common issue with inline list items. The fix that worked for me was setting the ul font size to 0 and setting the li font size back to the required size.

There was also a grey border at the top of the website that was especially apparent when the dark theme was activated. I removed it by deleting border-top: 2px solid $color-text; from layouts/partials/head.html.
Reducing CSS Filename Length
Neocities only accepts file names of a certain length. Hugo was generating CSS style templates that had SHA512 fingerprints in the file names. This was too long for Neocities, so I replaced the code snippet resources.Fingerprint "sha512" with resources.Fingerprint "sha256" in layouts/partials/head.html.
Site Building Error Fix
When first building the blog using hugo serve, I got a no such template "_internal/google_analytics_async.html" error. I fixed this by removing the following block of code from head.html:
  {{ if .Site.GoogleAnalytics }}
  {{ if .Site.Params.googleAnalyticsAsync }}
    {{ template "_internal/google_analytics_async.html" . }}
  {{ else }}
    {{ template "_internal/google_analytics.html" . }}
  {{ end }}
  {{ end }}
Neocities CLI
Now that my blog was ready, it was time to publish it. I chose Neocities as a hosting platform: it’s free to host, ad-free, and I admire their mission of making it easier for anyone to make their own static website. They also provide a command-line tool for editing your website called the Neocities CLI. Once I installed the CLI, all I had to do was publish my finished website using the command hugo, and then upload the resulting public folder containing my published website to Neocities using the command neocities push public.
I’m pretty happy with how everything turned out. I hope this can be useful to someone building something similar! Now that my blog is up and running I’ll probably be making some posts about the home server I’m setting up, so stay tuned. Thanks for reading :-]